I can’t turn left

Standard

Normally I try to write something interesting (or at least something to help you kill time at work while you’re pretending to work on that graph sheet but realllyyy you’re cruising the internet and wishing so-and-so would text you) but today I’m just going straight for the kill. Last night I made my own version of the infamous Chipotle Burrito Bowl and I’m extremely happy with the results. The closest Chipotle is a half hour drive away that involves a very annoying left-hand turn across 3 lanes of oncoming traffic. I hate left hand turns, I’m terrible at them. Ironically I’m an awesome left-hand parker. I could park an elephant in a clown-car parking spot as long as it involved a left-hand turn…right hand turns may unfortunately result in scraped cars and notes of apology placed on their windshield.

The Burrito Bowl seems easy enough at first glance: rice, beans, corn, lettuce, cheese, salsa, meat and source cream and/or guacamole. Should be a breeze to mimic, right? Not exactly…these simple ingredients have more complexity when you really start to analyze the flavor. The saltyness of the meat, cheese and beans need to meld well with the lime cilantro rice and the refreshing yet tangy homemade salsa. I happened to have steak on hand so I chose to do a carne asada marinade that I found online. The recipe says to let it marinade for one hour but I marinated mine all day and I think it helped the flavor really seep into the meat. I have to admit that I don’t think the steak flavoring matches that of Chipotle but it’s a nice starting off point.


Homemade Chipotle Burrito Bowl Recipe

Steak

Marinade (taken from Picky-Palate.com)

  • ½ cup extra virgin olive oil
  • 2 tablespoons lime juice
  • ½ teaspoon ground cumin (I used 1 to 2 teaspoons)
  • ¼ teaspoon salt
  • ¼ teaspoon ground black pepper
  • 1 pound carne asada beef or flank steak
  • ½ cup finely chopped white onion
  • 2 cloves minced garlic

Whisk oil, lime juice, cumin, salt and pepper in a bowl until combined. Place beef, onions and garlic in a large plastic ziplock bag and pour marinade inside bag. Close bag and massage beef with marinade until it’s thoroughly coat. Place in refrigerator and marinade for at least one hour (I recommend several hours).

Grill beef until brown, about 3 minutes on each side and then transfer to a cutting board. Let the meat sit for at least 5 minutes (so it retains its juices) and then slice the meat against the grain (very important to go against the grain). Serve atop your burrito bowl.


Lime Cilantro Rice

  • Uncooked white rice and water (refer to directions on rice package for measurements and cooking time)
  • Zest of one lime
  • Juice of one lime
  • Cilantro, chopped
  • 1 teaspoon salt (and more to taste)
  • 1 entire green onion bulb, sliced

Combine water, rice, salt and lime zest and cook according to the directions on the rice package. When rice is done, remove from heat and stir in green onion, cilantro and lime juice. Season with salt to taste.


Tomato Salsa

  • 2 medium tomatoes
  • 1 half jalapeno, seeded and ribs removed and then diced
  • Chopped ilantro
  • 2 tablespoons green onion, chopped
  • 2 tablespoons lime juice
  • Salt and pepper

Chop tomatoes and sprinkle with ½ teaspoon salt. Let sit for about 5 to 10 minutes as the salt draws out the water. Drain the liquid and then combine the tomatoes, jalapeno, cilantro and green onion. Sprinkle with lime juice, salt and pepper to taste.  Let sit a few minutes before serving so the flavors really set.

Other components:

Mexican cheese, shredded lettuce, sweet corn, canned pinto or black beans (drained), sour cream, guacamole

Assembly: spoon rice into a bowl then top it with sliced meat, beans, lettuce, sweet corn, tomato salsa, cheese and sour cream/guacamole.

Congratulations, you just made a knock-off Chipotle Burrito Bowl at home! Now sit back and enjoy your burrito bowl as you watch a girl wearing mint-green sunglasses try to make a left-hand turn. Hey, don’t laugh! Even beautiful people have this problem!

"Have you ever wondered if there was more to life, other than being really, really, ridiculously good looking?"

Lie Pretty And Love Purely

Standard

So I’ve been a pretty big fan of Pretty Little Liars since the show first aired a few seasons ago. Besides the fact that PLL reeks of mischief, murder and mayhem it is heavily laced with fabulous fashion…and I mean cutting-edge,  you-won’t-see-every-other-girl-on-the-street-wearing-this fashion. And the best part is that the pieces shown on PLL can actually be worn by your average human being at work, school or out and about as opposed to, say, Sex and the City where Carrie’s shirt would be a $500 Versace piece. Plus, let’s get real here…you can’t hit up the local restaurant wearing a flower on your shoulder that’s the size of a golden retriever (unless you’re a fictitious character living in New York City).

The characters on PLL may be in high school but they dress like twenty-somethings with maturity, taste and edgy creativity. I noticed they’re often at the forefront of trends months before they show up in general public. That hair feather you see every other girl on the street wearing? Yeah, PLL had it first.

Because of this show I am now obsessed with the Knitted Dove line of sweaters that have whimsical designs on them like unicorns and birds. I should note these are whimsical but age-appropriate (i.e. the unicorn is not oozing pink glitter) designs.


Spencer Hastings and her Birds of a Feather Sweater

Here is the back of the sweater....adorbs!

Spencer and her Savvy Horse Cardigan


Unfortunately these sweaters are not only a little on the pricey side but are also VERY hard to get a hold of as the Knitted Dove seems to only put out a limited amount of them and the Knitted Dove website hasn’t been updated yet. I heard a whispering that the Savvy Horse Cardigan should be available this fall…fingers crossed!

While researching how to get that blasted cardigan I came across this adorable polka dot skirt on ShopRuche.com. While I adore fall colors like dark reds, browns and oranges I enjoy adding quirky touches to my winter wardrobe. This skirt would be a refreshing addition and can easily be transitioned from summer to winter by pairing it with a thick sweater and leather riding boots.


Now let’s talk about Aria Montgomery. I love that girl and not just because her boyfriend is a hunky bookworm (Oh Mr. Fitz, you’d make a comprehensive analysis of War and Peace sexy) it’s cause the girl has spunk. She’s got personality and she marches to the beat of her own drum. This unique personality is reflected in her funky and creative style…sometimes it’s a bit too grunge/rocker for me but just when I think she’s gone too far she shows up with an outfit sprinkled with sweetness and I’m smitten again.

Like their fashion, the Pretty Little Liars are neither sugary perfect nor sinfully bad. They’re sophisticated, complex characters that would do anything to protect those they care about while trying to stay true to themselves. They may lie pretty but they love purely.


Come into my kitchen….I’ve got cookies

Standard

It’s been kind of a crazy week. Besides completely go nutso on the hair dye, making two trips to Sally Beauty and one final, blessed trip to the hair salon to fix the Morticia-Addams-esque result of the Sally Beauty trip…I also got sick. Here’s what I hate about being sick (besides the gooey snot, midnight drool, trucker cough and the weird craving for human flesh…) I couldn’t TASTE anything. Like nothing, not even my toothpaste- for all I know I was brushing my teeth with Bengay. How can I describe food if I don’t even know what it tastes like?? I thought about hiring some sexy construction worker to sit at my kitchen table and eat my food while describing every bite in intimate detail as I awkwardly lean against the counter, giggling and twirling my hair. But alas I am poor…and the local construction workers already have a restraining order against me. Holding a jackhammer hostage in return for kisses is apparently frowned upon in this state.

Luckily prior to my being diseasoned (I don’t need you Dictionary.com, I’m makin up my own words!) I had gone on a baking/cooking spree that involved over a dozen eggs and several sticks of butter. And some pants that suddenly got very tight.

There are probably over a million chocolate chip cookie recipes in the world…so why not confuse you even more by adding another one to the mix? Since the grass is always greener on the other side (for me anyway) I am never satisfied with just one chocolate chip cookie recipe. I have to try them all.  Cookie whore? Maybe.

This recipe I came across in a recent copy of Family Circle (the cover had Halloween pumpkins all over it…I was so excited I did a happy dance and screamed so loudly no sound came out. Oh yeah baby). It’s from McCormick and their recipe calls for an un usually large amount of butter and vanilla extract (duh). I actually really enjoyed these….they had such a nice flavor that I’ve kept the recipe and am sticking it in my cookbook for later use (instead of throwing it away with a disparaged sigh as I’m wont to do). They’re uber-buttery which I love and pretty rich. I first baked mine at room temperature but they came out a little burnt, even at only 7 minutes in the oven. But once I chilled the dough for a few hours and then baked them they came out beautifully and made for some very attractive cookies.


For extra cookie-ness combine cookies with Chocolate Chip Cookie Dough Ice Cream


McCormick Vanilla Rich Chocolate Chip Cookies

  • 3 ¼ cups flour
  • 1 tsp baking soda
  • ¾ tsp salt
  • 1 1/3 cups butter, softened
  • 1 ¼ cups granulated sugar
  • 1 cup firmly packed light brown sugar
  • 2 eggs
  • 4 tsp vanilla extract
  • 1 pkg (12 oz) semi-sweet chocolate chips
  • 1 cup coarsely chopped walnuts (optional—I did not add these…have you seen the price of nuts these days??)

Mix flour, baking soda and salt in a medium bowl. Beat butter and sugars in large bowl with electric mixer on medium speed until light and fluffy. Add eggs and vanilla; mix well. Gradually beat in flour mixture on low speed until well mixed. Stir in chocolate chips and nuts, if using them.

(You can refrigerate the dough now in the bowl or wrap the dough in plastic wrap and stick it in the fridge/freezer until needed).

When ready to use drop by rounded tablespoons about 2 inches apart onto ungreased baking sheets. Bake at 375 for 8 to 10 minutes (mine took 7 minutes) or until lightly browned.

Share with friends and family or use them to lure construction workers into your kitchen.

Finger foods….or food fingers?

Standard

So I’m sitting here watching Chopped while munching on Trader Joe’s Milk Chocolate Covered Toffee Popcorn. Oh it’s good stuff (the popcorn, I mean. Hearing a whiny chef complain that a competitor stole his pickled pepper idea isn’t such good stuff.).


Besides finding the Toffee Popcorn I was also excited to discover that Trader Joe’s ground coffee is a decent price ($4.99 lb), as are the price of Luna bars (.99 cents per bar) and their sliced Fontina cheese ($3.49 for a package of six slices…which beats the almost $6 a package for regular sliced cheese at Haggen! Ack!).

One of my favoritest finds at Trader Joe’s though is the Goat Cheese and Sundried Tomato Ravioli. If I hadn’t cooked up Trader Joe’s Margherita Pizza for dinner I would have ripped open the ravioli, thrown them in a pot of boiling water and obsessively stared at the little raviolis in a feeble attempt to make them cook faster with my awesome psychic abilities. Unfortunately boiling water with my brain rays will have to wait till another day.


Please do pair me with a sage butter sauce!


In case I haven’t mentioned it before, a well-made goat cheese tastes like you’re eating a chunk of tangy, creamy earth. Goat cheese was not meant to be processed or combined with crazy chemicals. It must run free in the sun and only be paired with fresh ingredients like sweet tomatoes and heavenly basil. I hope Trader Joe’s doesn’t let me down. Unfortunately the Margherita Pizza was an utter disappointment as it was over-spiced, heavy and the 4 tiny slices of grape tomato they threw on top were the only part of the pizza I actually liked.

Where was I? Oh yeah. Chocolate Covered Toffee Popcorn. Reruns of Chopped.

There’s one thing you can always rely on when watching Food Network’s Chopped: someone will cut themselves (hence the title of the show? Mwuahaha!). So far no one has lost an arm. Or an ear. Or a toe. But I’m pretty sure various bits of thumb and forefinger have gone missing in the kitchens of Chopped…possibly floating around in someone’s Chilled Cucumber Soup. I truly feel bad for the judges on that show—watching the chef prepare your meal with one hand wrapped in a glove that is slowly filling with blood is not what I want to see when I sit down for dinner.

"A chocolate covered finger of a man named Clark"


But I have to give the chefs credit- they don’t get the respect that Olympic athletes do when they complete a task with an injury. Sure a chef won’t finish a complicated amuse-bouche service, receive perfect 10 scores from the judges and then be carried off by a mustachioed Russian coach while tearfully waving at the fans. Instead they clean off their work station and get back to work. Meanwhile customers savor the exquisite taste of a tangy blackberry reduction as it melds with the rich, milky  pate in one bite…not knowing the amount of blood and sweat that went into making that delicious delicate dish. Literally.

So with that in mind I bring you a cookie recipe that I managed to make with a glaring migraine and stomach that seemed like it was trying to contain a typhoon. I imagine in my stomach bits of carrot were clinging to life-boats made of bread while being blasted with coffee-scented winds amidst a sea of Capri Sun. It felt even grosser than it sounds.


These little lemon cookies are cut and decorated with sugar and icing to look like golden lemon slices. What I love about this recipe is that very minimum work goes into it yet the end result is a beautiful cookie with a lovely presentation. The dough is super easy to work with when rolling it out and the only unusual ingredient is the yellow sugar that you can find at any grocery store. If you’re feeling lazy (as I oft do) and don’t want to deal with piping tips you can put the lemon icing in a plastic ziplock and cut off a tip of the corner of the bag, making sure to create just the tiniest hole which allows for better control of the icing.

As a testament to the power of the cookie, I immediately felt uplifted and energized after making these cookies. Looking at these cheerful lemon slices will put a smile on your face and the sweet, tangy flavor is like a kiss from the sun.

But you know the best thing about this recipe? It was found in a real, honest-to-goodness cook book. One that is stained with food, marked with hand-written notes and illustrated with pictures and drawings that you just don’t find in cook books these days. It’s a piece of history and a work of art.

Lemon Slice Cookies (Betty Crocker’s New Picture Cook Book, circa 1961)

  •  1 cup soft butter
  • 1 cup sifted confectioners’ sugar
  • ¼ tsp salt
  • ¼ tsp yellow food coloring
  • 1 to 2 tbsp grated lemon rind
  • 2 ½ cups flour
  • yellow crystal sugars

Heat oven to 375 degrees. Mix butter, sugar, salt, food coloring and lemon rind thoroughly. Add flour and blend well. Roll dough to a ¼ inch thick on floured cloth-covered board. Cut into 2 inch circles, then in half. Sprinkle with crystal sugars. Place on ungreased baking sheet. Bake 6 to 8 minutes. Cool. Roll rounded edge in mixture of 1 (pasteurized) egg white and 1 tsp water (you can probably use milk instead of the egg and water) and then roll the edge in crystal sugars. Add a thin line of icing ¼ inch from outside edge. (I added little detailing towards the middle of the cookie to continue that ‘lemon wedge’ look).

To make the icing: Blend 1 cup sifted confectioners’ sugar, 1/4 tsp salt and 1 tbsp lemon juice. Fill pastry tube or paper funnel and squeeze onto cookies. If icing is to thick add more juice or a little water (I like my icing on the lemony side so I added more lemon juice).

I don’t think you’ll find any finger chunks in these cookies. They do, however, bear a striking resemblance to ears…


3 Degrees of Blueberries

Standard

I love pie. I love apple pie with melted cheddar cheese on it, I love pie-flavored ice cream that has chunks of pie crust in it and cinnamon-fruit swirls and I love candles that make my room smell so much like pumpkin pie that I want to gnaw on the walls. Our Founding Fathers established this country so we could eat our pie the way we want, however we want. I like to think that George Washington went to bed at night dreaming of a day when a random girl in Granite Falls had the freedom to eat pie off a stick. That’s right…pie off a stick. God bless America.


Why put pie on a stick? They said it was a ridiculous idea. They said it would be too crumbly. They also said that rainbows are useless and just clutter up the sky. Yeah, ‘They’ won’t be getting a special Christmas Wedgie from me this year.

Like fashion, food has its trends and its ‘IT’ items. Avocado ice cream, cupcakes, cake pops…they’ve all had their 15 minutes of fame. This year it’s Pie who’s showing up at P-Diddy’s White Party, getting into drunken fights on the airplane and being a guest judge on American Idol. When I first spotted Pie Pops in a magazine I fell in love. If done correctly they’re gorgeous little creatures with their frilly crimped crust and hint of sweet filling dripping between the seams. Like grown-up pies you can fill them with whatever you want (pecans, blueberries, mincemeat) but the pops never really grow up and insist on being made into fun shapes like hearts and stars.

After doing a bit of research online I ended up combining two separate Pie Pop recipes based on convenience and taste. One recipe called for canned blueberry pie filling- while I have nothing against canned pie filling and have been known to eat it straight from the can I had several cups of fresh-from-the-garden blueberries that I was dying to do something with. And let’s face it: there’s something about fresh ingredients that make you feel like you’re eating sunshine.

The other recipe called for using mini-muffin pans as a mold for the pies—while these would make for some authentic-looking pies I was afraid they would be too top-heavy to stay on the stick and thus chose to just use round cookie-cutters instead.


I made the blueberry pie filling from ScandoGirl on Allrecipes.com but used a little less than the 1/2 cup sugar the recipe calls for and added a few tablespoons of lemon juice because I felt it needed some liquid. I then followed the instructions I found on Bakerella for making the Pie Pops.

These are a little heavy on the crust with very little pie filling (you have to regulate the filing so it doesn’t spill out during baking). But don’t freak out if they leak while baking- the filling thickens up once they cool down and the hint of pie filling peeking out the edges give the pops a nice rustic look.

(Note: I highly recommend getting the refrigerated pie dough that is not in a pan as it will be easier to roll out than pie-dough pre-fit in a pan)

These were beautiful and extremely easy to make; they would be great party favors or fun gifts to give to close friends. Or you can just sit there and watch as your two year-old inhales your pie-pop before you get the chance to take one bite.


If you have left-over pie dough and don’t feel like making more pops you can press some of the dough into greased muffin pans, put a few tablespoons of filling in it and top with a cut-out of dough (making sure to crimp the edges). Sprinkle with sugar and bake in a 375 degree oven for about 10 minutes or so. Once they’re cool you can pop them out and serve as adorable little mini-pies! (who doesn’t love things that are mini??)


And because I hate to waste anything that is delicious I put my left-over blueberry mixture into a saucepan and cooked over low heat until the berries broke down into a deliciously thick blueberry sauce which I then ate over vanilla ice cream. Cause there’s an Ice Cream Clause in the Declaration of Independence. Look it up.


Do Princesses eat Bourbon Pasta?

Standard

On the outside I’m putting on sunscreen and wearing sandals—on the inside I’m singing Christmas carols and thinking about snow boots. It’s the middle of August and I’m eyeing Cut-Your-Own-Christmas-Tree-Farms. I want a hug…where’s Santa when you need him?


With autumn on my mind I bought this gorgeous pair of suede boat shoes. I tried on several pairs of similar (but cheaper) shoes at Famous Footwear and found these to be the most comfortable as well as the most attractive. They have a rich, durable feel to them and they cushion my feet well which I need right now as I’m on my feet all the time at work. While these shoes look great with just about any pair of pants they also pair well with dresses and skirts in autumn hues. I’ve been eyeing them for a while but couldn’t muster up the courage to buy them (will they age me 70 years? Will Boy Scouts call me ‘Grams’ and offer to help me across the street?). That was until I saw Kate Middleton wearing them… I have to confess right now: I totally dig Kate. Girlfriend could be Queen of England someday but she buys her own groceries and wears sheer pantyhose. I want to be like her when I grow up. The sparkly crown and the sweet, long-toothed prince are just an extra bonus.

What I like most of all though is her English-country-meets-classic-London style.


Not surprisingly I was craving hearty, fall foods like thick chunks of beef simmered in broth (Mmmm! Boeuf Bourguignon!) but alas my kitchen was almost 70 degrees (70!) so I decided to make something a little more summer appropriate. This pasta dish has some of the flavors of a cozy winter meal but doesn’t make you feel like you ate half a cow drenched in gravy. If you’re not a fan of mushrooms don’t shy away; their woodsy flavor offsets the creamyness of the pasta and they provide much-needed textural depth to the dish. And the bourbon…well…do you really need to ask why it’s there?


Bourbon Pasta with Mushrooms (adapted from thepioneerwoman.com)

  • 6oz sliced button mushrooms (you can also use 24oz of sliced baby Portobellos if you really like mushrooms)
  • 2 tablespoons olive oil
  • salt&pepper
  • 2 tablespoons olive oil
  • 2 tablespoons butter
  • 1 onion, sliced
  • ¾ cups Bourbon (the flavor really mellows so if you want a stronger kick you can add more)
  • 1 cup chicken broth
  • 1 cup fat-free evaporated milk (or regular milk but I’ve found the canned stuff is creamier)
  • Salt and pepper
  • One box pasta (Rotini, Penne, etc.) cooked

Preheat oven to 375 degrees and drizzle mushrooms with olive oil then sprinkle with salt and pepper. If using button mushrooms cook for about 10 minutes or until golden brown. If using thicker, larger mushrooms like Portobello cook for 20 to 25 minutes.

In a large pot heat 2 tablespoons olive oil and the butter over medium heat and add the onions, sautéing until they’re translucent (a few minutes). Pour in the bourbon and let it simmer for a few minutes (I briefly remove the pan from direct heat when pouring in the alcohol…better to be safe!). Add the broth and let it reduce for a few minutes before stirring in the milk. Mix in the mushrooms, salt and pepper (to taste) and let it simmer until the sauce thickens. If the sauce isn’t getting thick enough you can always sprinkle in a little cornstarch (I used 2 tablespoons last time) to thicken it but keep an eye on it, the cornstarch works quickly!

Stir in the pasta and add salt and pepper if needed.

Nice people, bad instant coffee

Standard

I’ve been eyeing the Starbucks Via Iced Instant Coffee packets for a while now but have been hesitant to try it…purely because they’re a bit overpriced. So I was excited to get a hold of a free sample today and immediately ripped that sucker open. I like how the instructions say you can mix it in a regular ol’ water bottle– just 16 0z of cold water required (and maybe a few ice cubes). I was also happy to see that it was pre-sweetened with cane sugar cause I love me some sweet iced coffee.

Get outta my coffee cup!

Unfortunately it tasted awful. I didn’t even finish mine, it was so gross. And this is coming from someone who has no problem drinking both pricy Starbucks coffee and uber-cheap instant Folgers coffee. It takes a lot to turn me off coffee and Via succeeded with flying colors. The coffee was too sweet with the sugar having that icky processed taste. That unique flavor that Starbucks coffee usually has was almost unnoticeable– to be honest I’ve had coffee-flavored ice cream that was stronger than this!

To add insult to injury they charge $10 for a box of 12 packets on the Starbucks website. If you don’t want to pay for shipping (or don’t feel like waiting for your coffee fix) you can find them at Target but it costs more!

I much prefer the Iced Coffee recipe I posted earlier- if you’re willing to take a bit of time out of your day you can save money (a pound of coffee can be found for $5 to $6) and if I did my math right you’d get 16 servings (16oz each) out of it, compared to Starbucks’ 12 servings. But the best part is: you can use cheap coffee and it still tastes better!

The $4 to $5 you save can then be used to buy super cute owl earrings from Target that get thrown into a bath tub by a toddler and you run, slow-motion, trying to save them as they slip down the drain. The end.

Just call me George…

Standard

So my life is pretty much like one super long, awkward Seinfeld episode. Seriously. I stumble, headfirst, into some weird and ironic situations. You know those times when you try to do something good and it all gets shot to heck? Or you say something in an attempt to make someone feel better and it just makes things worse? Yeah, I call those my ‘Costanza-moments’. If you don’t know who George Costanza is then please do yourself a favor and rent a couple episodes of Seinfeld. Partake in the awesomeness of Jerry, George, Elaine and Kramer. You will laugh and you will cry…and then cry some more when you realize that you’re George (a short, balding, stocky man from Queens).

A Festivus for the rest of us!

I want to officially change my name to ‘George’ just so I could use this message on my answering machine.


This bread reminds me a lot of George. It’s burnt, unattractive and it sets off your smoke alarm (and then pushes the elderly out of the way as it flees the burning building). But God bless its charred little heart—you bite into it and it’s crunchy, buttery and strangely wonderful. Suddenly you smile and realize- Hey, George ain’t so bad…he’s kinda weird but I like him. And George smiles back then wipes his cheeto-covered hands on your sofa and reminds you that when you answer the phone you have to say ‘Vandelay Industries’.


That black burnt stuff? That's butter...tasty, tasty buttery goodness

George’s Bread aka ‘The Bread’ from thepioneerwoman.com (I want to be Ree when I grow up!)

Ingredients:

  • One loaf of bread split lengthewise
  • 2 sticks salted butter, softened

Preheat oven to 350 degrees.

Spread one stick of softened butter on each half of the loaf. Make sure you don’t miss any spots, you really need that butter to cover the bread!

Place on a cookie sheet and bake for 10 minutes, or until butter is melted and starting to soak into the bread.

Crank on broiler and broil bread for 3 to 5 minutes, watching the whole time. Remove when butter has started to brown and blacken. Your smoke alarm might go off but that’s good because a) it means the bread is reaching peak deliciousness and b) it means your smoke alarm works (always a good thing, right?).

When this comes out it looks burnt and scary, like something your kid sister Meredith would make when she got distracted by a mirror and spent half an hour making silly faces at herself while the bread was burning in the oven. But trust me…if you do it right it’s goooood, oh so goooood.

When you’ve had a Costanza day just remember: you may have accidently taken someone out with envelope glue and was chased down the street by several angry elderly people in motorized scooters but at least you’re not Newman!

A teapot, a song and a cake

Standard

Today is one of those days. The Evil Clothes Gnome stole my favorite sweater so I went out searching for a replacement and it seems the stores have sweaters in EVERY color and material (‘We have sweaters made from unicorn fur and Leprechaun sneezes!’) except WHITE. Wha?? The Bubble Tea machine was broken at the local corner store. And my car decided it wants to drive only on curbs. So I spent the day driving on sidewalks, partially clothed and dehydrated.

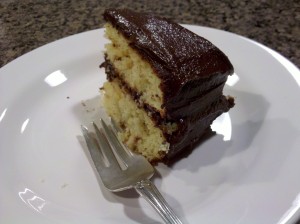
By the time I get home I had a headache and needed sugar. Luckily I had a butter cake mix lying around and had just recently bought a chocolate frosting mix from Trader Joe’s (or I should say his pastry-inclined cousin Baker Josef).  I have to confess that when it comes to frostings and icings I am a snob. A total ‘I-speak-in-a-smarmy-voice-while-drinking-tea-with-my-pinky-finger-sticking-out’ snob. I hate grocery-store canned frosting with a passion—if we were to meet in a dark alley somewhere it would not end well. But there are times when I get tired of the same old buttercream so boxed/specialty frostings send a shiver of excitement down my spine. Unfortunately they tend to be pretty pricey as well.

Duff Goldman of ‘Ace of Cakes’ fame charges around $8 for his chocolate icing.

Thomas Keller, a highly decorated chef who’s chocolate-chip cookie recipe totally blew my mind the first time I made it (cold butter?? Sifted chocolate?? A water mist??) has his own line of baking products available. His Ad Hoc Chocolate frosting is (brace yourself) $20 ! For a container of frosting! Yeah. For that price the frosting better be one of Lord Voldemort’s Horcruxes.

Luckily Baker Josef’s Chocolate Frosting Mix runs under $3 though you do have to sacrifice time and a stick of unsalted butter to make it. I managed to mix it up when I wasn’t nursing a headache and watching Beauty And The Beast (Don’t give up Beast! Belle loves you!).

Girl Wants Frosting. Frosting Wants Cake. Awkward.

More specifically, the instructions call for one stick (4 oz) of unsalted butter (room temp) and a few tablespoons of hot water. I only had salted butter and noticed that the frosting was a tad bit on the salty side for my taste (but no one else complained). The box states that it makes enough for two 9-inch round cakes. It does but just barely.

I added a tablespoon of butter extract to the cake batter to help enhance the flavor

If you want to spice up the frosting you can use flavor extracts like cherry, rum or coffee in place of the water

I enjoyed the buttery base and the rich chocolate presence but noticed it had that familiar ‘store-bought’ frosting taste that I’m not crazy about. Even though it doesn’t beat homemade frosting I consider it a step above The Frosting That Shall Not Be Named (But Can Be Found In A Container At The Grocery Store). I’ll continue searching for a better boxed/pre-made icing and probably won’t buy this product again. But I still enjoyed licking the beaters while a teapot sang to me.

Trolls don’t like coffee grounds

Standard

I love iced coffee. Like, I love it more than hot coffee. So much so that I order it all the time from Starbucks which can be weird in the winter when there’s several inches of snow on the ground and I have to put my Grande Non-fat Iced Mocha down because I need both hands to pry open the door of my car which is frozen shut. Again. One of these days the handle is going to pop off and I’ll be left standing there, holding the handle to my car and slurping noisily from my iced coffee.

Yesterday we actually had weather that resembled this ‘summer’ they speak of..what is it? Where does it go? Oh mysterious season, when will you show your face?

Seriously, we get more rainfall here than in London, England.

So when we actually get a glimpse of sun we all rip off our clothes and lay out in it…even if it’s sunny and 40 degrees.

This iced coffee recipe is perfect for those wonderful summer days when the weather reaches a toasty 60 F and you’re working on your tan (cause it looks so good under that raincoat).

Perfect Iced Coffee  (from thepioneerwoman.com)

1lb ground coffee

8 quarts cold water

Milk, Half&Half, Cream, Sugar or whatever you like to add to your coffee


In a large container, mix ground coffee with water. Cover and let sit at room temperature for eight hours or overnight.

Line a colander with paper towels (or a mesh strainer with cheesecloth, recommended if you don’t like any specks of coffee grounds in your coffee) and set over a pitcher or other container. Pour coffee mixture through the strainer/colander so that all the liquid runs through. Discard grounds (or put in your garden to ward off the slugs and trolls).

Place coffee/water mixture  in the fridge and allow to cool. Enjoy when needed.

To make the iced coffee throw some ice cubes in a glass cup, fill up halfway with coffee and then add a splash (or more) of your dairy preference and/or a sprinkling of sugar.

If you hate ice cubes with a passion like I do (they melt and dilute the drink, bah!) you can be super awesome and freeze some of the coffee in ice cube trays and use the ‘coffee-cubes’ in your drink. Crisis averted. The world makes sense again.